Too many programs at Windows startup slow down the startup time of the computer. You should disable unnecessary programs from startup and leave the essential programs/application(Antivirus, Windows Security programs) on startup. In this tutorial, you will learn to manage startup programs for Windows 10 and Windows 7.
How to disable startup programs Windows 10?
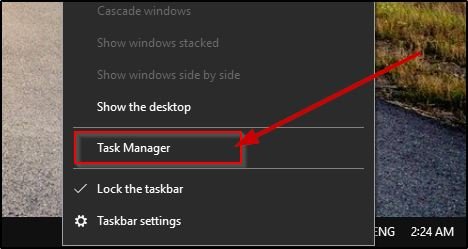
STEP 1: Right-click on the taskbar and select Task Manager.
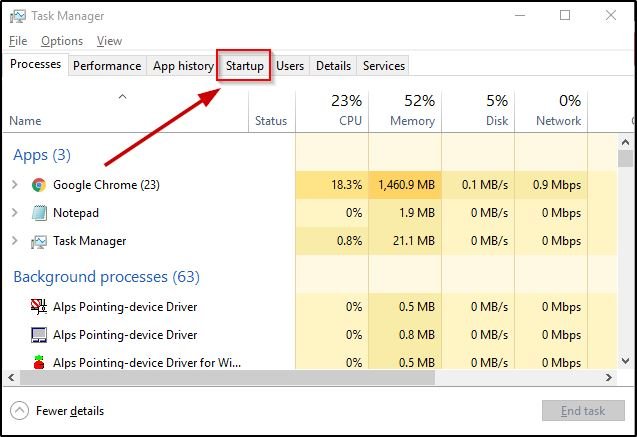
STEP 2: On the Task Manager window go to the Startup tab.
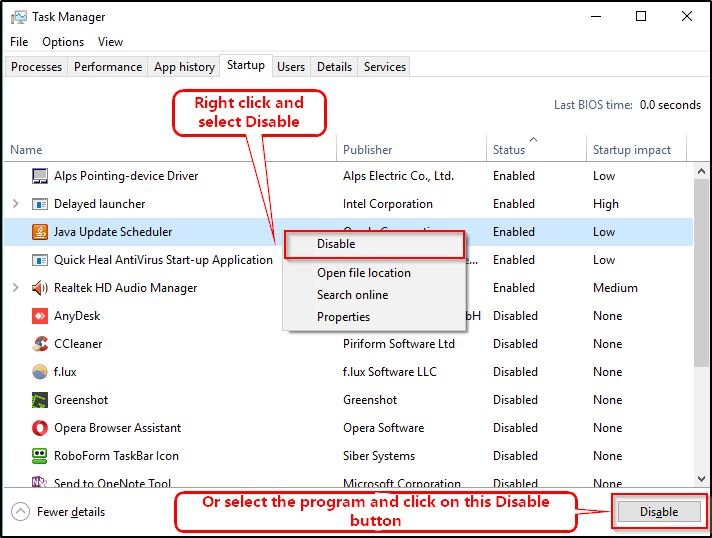
STEP 3: Here you will see the list of programs that are added to the startup list. On the status column, you can see if the program is enabled or disabled. You can sort the list by the status to see all enabled programs serially.

STEP 4: Now select the program you want to disable. Right-click on it and select the Disable option, or after selecting click on the Disable button at the bottom right of the window.
SEE ALSO: How to uninstall Internet Explorer from Windows?
Now, you can check for if the program is disabled. This program will not load at startup from the next boot of the computer.
How to disable startup programs on Windows 7?
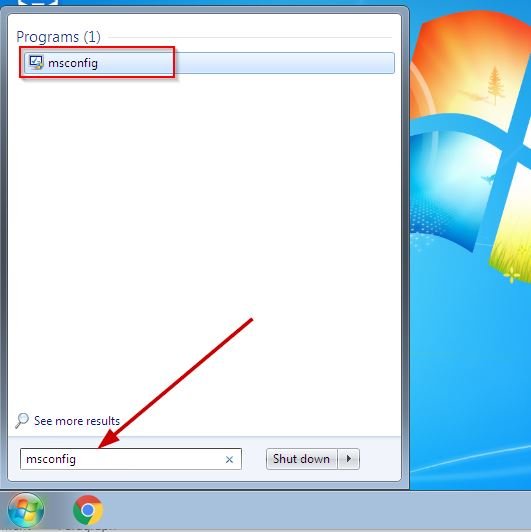
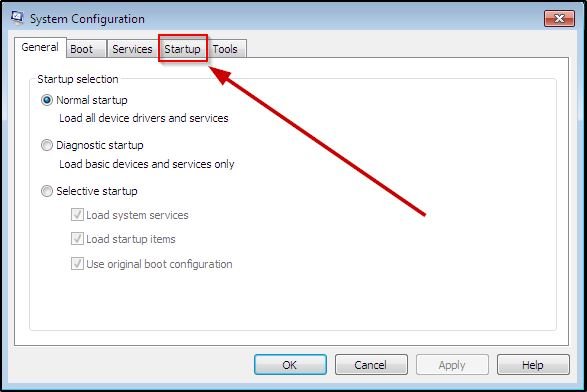
STEP 1: Click on the start menu and search for msconfig. You will see a program named msconfig on the list. Select the program to open System Configuration.
STEP 2: Go to the Startup tab on System Configuration.
Remember, this is the system configuration manager for Windows 7. Do not change any settings here. Otherwise, it can malfunction the computer.
STEP 3: On the Startup section you can see the list of programs are currently added to load at computer’s startup. Uncheck the program which you want to disable at startup and click on the OK button to save the changes.

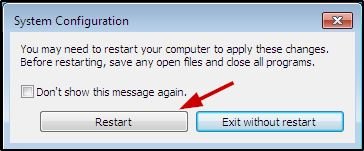
STEP 4: After saving the changes, the computer will ask you to restart to apply the changes. Restart your computer once.
Or you can select Exit without restart to restart your computer later. In this case, the changes will be applied on the next reboot.
SEE ALSO:
Disable startup programs using CCleaner(For all Windows version)
Using CCleaner you can disable startup programs for all versions of Windows. This application has many features included. Like Registry Cleaner, Duplicate File Finder, Drive Wiper, and many more. Let’s see how to disable startup programs using CCleaner.
STEP 1: Download CCleaner from its official website. The free version of CCleaner will work fine. After downloading install the program.
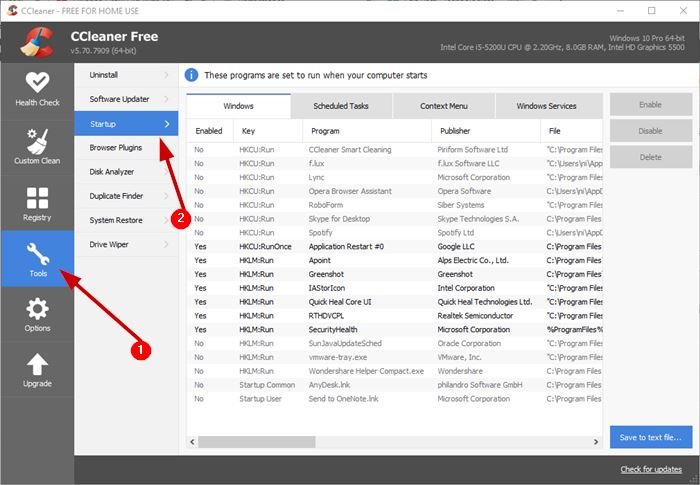
STEP 2: Open the CCleaner application. Click on Tools and go to the Startup section. You can see the list of programs added on startup with the current status, enabled or not.
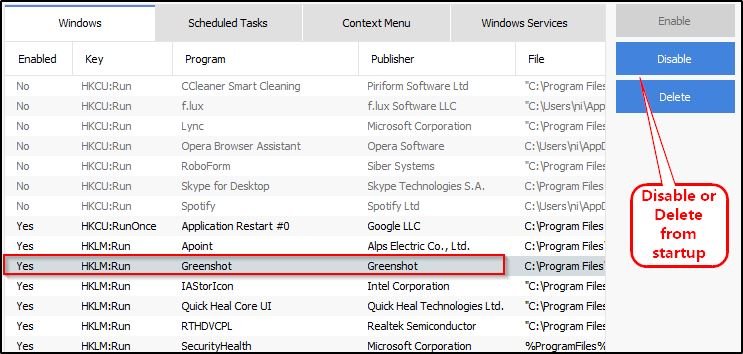
STEP 3: Here you can disable a program from startup, also you can delete a program from the startup list.
Select the program you want to disable and click on the Disable or Delete button on the right side.
SEE ALSO: 10 must have software applications on Windows 10
Having passed the long way from a database analyst and computer technician to an executive in charge of a large enterprise department's technical direction, he now uses his experience and the almighty power of the Internet to teach, inspire and empower young people and mature to extend their technological skills.
- Convert Multiple Images to Text using OCR using Python - November 10, 2023
- How to use WhatsApp on Android Tablet (Simultaneously) - September 1, 2022
- How to Cancel PayPal Subscriptions (recurring payments through PayPal)? - June 28, 2022


