Why do we need to create a group in Gmail? Well, when we want to send an email to multiple email accounts, we need to type every email id one by one. Though Gmail suggests the full email id when we type some letters of the email id.
But it would be much easier if we create a group and type only the group name instead of all email ids. On Gmail, you can create a label to group email ids. Check below to learn, how to create a group in Gmail?
How to create a group in Gmail:
- Log in to your Gmail account.
- Go to Contacts from the Google apps menu or directly go to Contacts by this link.

- You will be redirected to the Google Contacts page. Click on Create Label on the left panel.

- You have to write a name for the new label. Choose a name that will be easy to remember. Save the label.

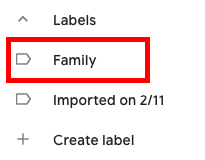
- Now you can see the newly created label on the left panel of the Contacts page.
- Now go to your contacts list from the Contacts menu on the left panel.

- Now choose the contact which you want to add on the new label, click on More actions(three dots at the right side of the contact), and click on the label on which you want to add the contact.

- The contact is now added to the label. You have to do this for all the contacts you want to add on the label.
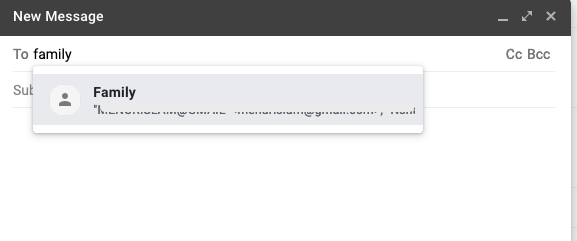
- Now when you will type the label name on the Gmail’s Recipients box it will select all email ids under it, click on it and done, all email ids will be filled on the recipients’ box. You do not have to type all the email ids one by one.
You can create labels as many as you need. Just name it properly to make it remember when you will need it.
Subscribe to this blog to get more technical tips.
You can check other technical tips by going to this section.
Considering the Internet to be great for feeding his lust for knowledge, he believes that Information Technologies (btw he got a Bachelor's degree in) can change the world for the better.
Having passed the long way from a database analyst and computer technician to an executive in charge of a large enterprise department's technical direction, he now uses his experience and the almighty power of the Internet to teach, inspire and empower young people and mature to extend their technological skills.
Having passed the long way from a database analyst and computer technician to an executive in charge of a large enterprise department's technical direction, he now uses his experience and the almighty power of the Internet to teach, inspire and empower young people and mature to extend their technological skills.
Latest posts by Nur Islam (see all)
- Convert Multiple Images to Text using OCR using Python - November 10, 2023
- How to use WhatsApp on Android Tablet (Simultaneously) - September 1, 2022
- How to Cancel PayPal Subscriptions (recurring payments through PayPal)? - June 28, 2022


