By default Windows 10 sets the computer name with a generic name like ‘DESKTOP-E05N394‘. And this can be changed to a name you want.
You may want to change the computer name for many different reasons, like you want to identify the computer by giving it a name like ‘Entertainment-PC‘, or you may want to rename the computer to identify it on the networks by its name.
There can be many reasons for changing the computer name. Let’s see how to change the computer name…
How to Change Computer Name?
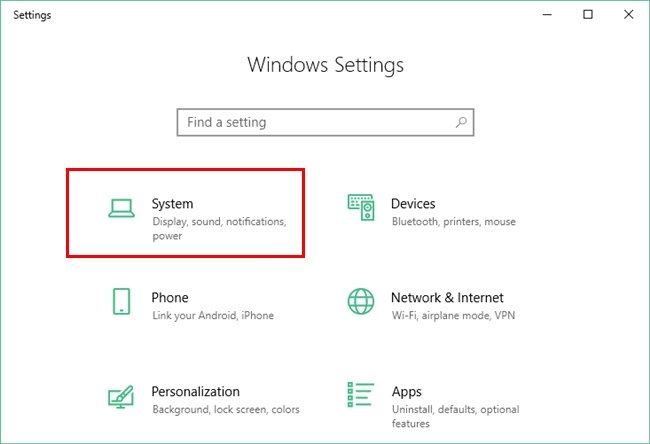
STEP 1: Open the Windows Settings by clicking on the Settings button from the Windows menu.

STEP 2: Go to the System option under Windows Settings.

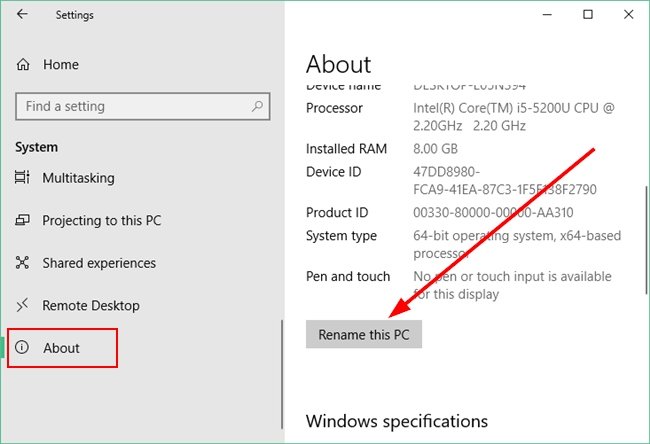
STEP 3: On the System settings go to the About section. Under About click on the Rename this PC button.

STEP 4: It will ask to enter a new name for the PC. Enter the name here and click on the Next button.

STEP 5: Finally, it will ask to restart the PC to make the change. After closing all the active applications click on the Restart now button.

Now, when the computer starts you can see the new name has been affected.
- Convert Multiple Images to Text using OCR using Python - November 10, 2023
- How to use WhatsApp on Android Tablet (Simultaneously) - September 1, 2022
- How to Cancel PayPal Subscriptions (recurring payments through PayPal)? - June 28, 2022


